What is light pollution and how to overcome it in astrophotography?
Practical advice on how to reduce or avoid light pollution in your shots.
December 31, 2024
Light pollution refers to the artificial brightness of the night sky caused by artificial light sources, such as street lights, buildings, vehicles, and other human activities.
If you are entering the world of astrophotography or astronomical observation with telescopes, this is one of the biggest challenges you will face from now on.
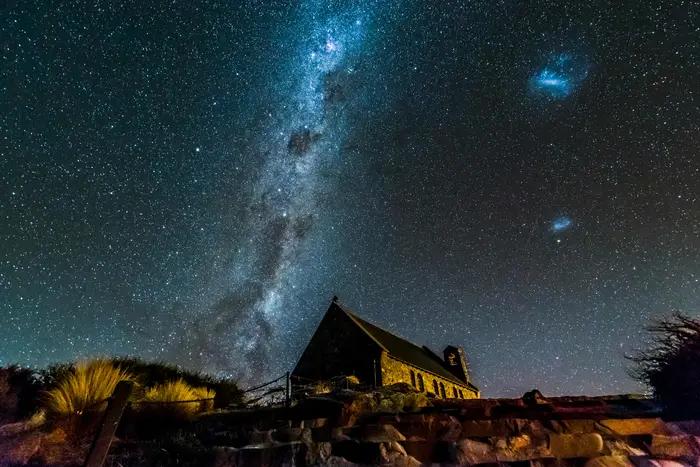
Light pollution is one factor that has the most significant implications for photography and represents a huge problem for astronomers and astrophotographers, both amateurs and professionals, since it is observed as a light interference that decreases the contrast of celestial objects, making it difficult to observe and capture images.
This interference is complicated to remove from photographs, but in this article, we will explain how to mitigate its effects so that you obtain spectacular photographs of the cosmos.
Better tools to mitigate light pollution in astrophotography
Many tools on the market help mitigate light pollution in photos; the first one we will talk about is the Bortle scale.
1. Bortle scale
This is a critical tool for assessing the quality of the night sky based on light pollution. Developed by John E. Bortle in 2001, it classifies the skies into nine levels, where 1 represents a completely dark sky, and 9 describes urban skies heavily polluted by light.
Knowing your location's Bortle index is crucial for planning your astrophotography sessions.
Applications and websites, such as Light Pollution Mat, allow you to identify the level of Bortle in various areas. These tools are handy for finding dark skies near your location.
2. Light Filters
Light filters are one of the most valuable tools for mitigating the effects of light pollution in astrophotography. These devices block or reduce specific wavelengths of artificial light, allowing the light emitted by astronomical objects of interest to pass through.
Below, we will list some of the most essential filters we highly recommend to mitigate annoying light pollution.
CLS (City Light Suppression) filters:
- Features: They are designed to block sodium and mercury vapor emissions, standard in street lighting. They allow wavelengths to pass that coincide with the emission of stars and nebulae.
- Advantages: They improve contrast and are ideal for general observations from suburban areas.
- Disadvantages: Not effective against LED lights, which have a wider spectrum.
Narrow-band filters:
- Features: Allow only specific wavelengths to pass through, such as Hα (hydrogen-alpha), OIII (ionized oxygen), and SII (ionized sulfur). They are perfect for nebulae and deep-sky objects.
- Advantages: They provide images with a high level of detail and contrast, even in moderately polluted areas.
- Disadvantages: Not useful for wide-field photography or for objects such as galaxies and star clusters.
Multiband filters:
- Features: Combine the characteristics of narrow-band filters, allowing multiple spectral lines to pass through at the same time. They are designed specifically for color cameras.
- Advantages: They are versatile and allow you to work with cameras that are not modified for astrophotography.
- Disadvantages: Lower efficiency compared to narrowband filters to capture specific details.
Light filters work with optical interference or dielectric coatings made of unique materials. These technologies allow filters to discriminate between desired and unwanted wavelengths.
When the filter is placed in front of the camera lens or on the telescope's optical train, it filters out the light before it reaches the sensor, improving the quality of the final image.
3. Parasols or light caps:
These attachments attach to the end of the telescope tube and block the entry of stray light from unwanted sources. They are instrumental in suburban environments or with nearby lights.
4. Dew shields:
Although their primary function is to prevent dew from forming on the lenses, they also help reduce peripheral light ingress.
5. Precision Focusers:
High-quality focusing systems ensure that the collected light is optimally concentrated on the sensor, maximizing image detail and minimizing light interference.
6. Collimators:
Ensuring the correct alignment of optical elements is essential to avoid distortions that can be amplified by light pollution.
7. Motorized approaches:
These devices allow the focus to be adjusted remotely, minimizing the possibility of light interference caused by accidental movements during manual focusing.
Combining these accessories with proper planning and the use of appropriate filters allows for significantly mitigating the effects of light pollution and obtaining high-quality astrophotographs, even in areas with some environmental pollution.
If these tools are not enough, there are also different softwares that can help you during the editing of your images.
Better software to mitigate light pollution in astrophotography
Light pollution in astrophotography can be corrected and minimized by using specialized software that allows images to be edited and their quality improved.
These programs offer advanced tools for removing unwanted light gradients, increasing contrast, and highlighting details of celestial objects.
Below, we share five of the best software for this purpose.
1. PixInsight
PixInsight is one of the most advanced and popular software among astrophotographers. Explicitly designed for astronomical image processing, it includes tools such as Dynamic Background Extraction (DBE) and Automatic Background Extraction (ABE), which are highly effective at removing light pollution gradients.
- Key features:
- Background gradient removal with DBE and ABE.
- Noise reduction and contrast enhancement tools.
- Stacking and calibration of RAW images.
- How to use it:
- Import your calibrated images.
- Use the DBE tool to select background points that represent star- or nebulae-free areas.
- Adjust the parameters to generate a clean background that will be subtracted from the main image.
2. Photoshop
Although not designed exclusively for astrophotography, Adobe Photoshop is a versatile software that is widely used for its advanced editing capabilities. By using layers and adjustments, gradient corrections can be made and contrast-enhanced.
- Key features:
- Layers and masks for localized adjustments.
- Filters such as "Curves" and "Levels" to balance colors and contrast.
- Additional plugins, such as Gradient Xterminator, which makes it easy to remove background gradients.
- How to use it:
- Open your image in Photoshop.
- Apply "Curves" adjustments to balance the brightness of the sky.
- Use "Levels" to adjust the intensity of the light and bring out the details.
- Apply masks to work on specific areas.
3. DeepSkyStacker
DeepSkyStacker is a free and specific tool for stacking astronomical images. Although its primary function is combining images to improve the signal-to-noise ratio, it also eliminates essential light gradients.
- Key features:
- Image stacking to increase signal-to-noise ratio.
- Gradient correction during stacking.
- Automatic image calibration with darks, flats and biases.
- How to use it:
- Upload your light, dark, flat, and bias images.
- Configure the parameters for gradient removal.
- Processes the stacked image and exports for further editing.
4. Affinity Photo
Affinity Photo is an affordable alternative to Photoshop, including similar astrophotography tools. Its intuitive interface and advanced options make it ideal for those looking for an efficient program without subscribing to expensive plans.
- Key features:
- Gradient correction and noise removal tools.
- Support for RAW image editing.
- Advanced local and global settings features.
- How to use it:
- Import your image and use the "Gradient" tool to smooth out light gradients.
- Adjust levels and contrast to bring out details.
- Apply noise reduction filters to improve sharpness.
5. StarTools
StarTools is an innovative and affordable option for astrophotography. Its focus on intelligent, non-destructive processing makes it a powerful tool for removing light pollution and enhancing images.
- Key features:
- "Wipe" tool for automatic gradient removal.
- Advanced contrast and saturation adjustments.
- Simplified interface for beginner users.
- How to use it:
- Open your processed image in StarTools.
- Use "Wipe" to eliminate gradients and light pollution.
- Adjust color and saturation to balance background and stellar details.
Software Characteristics Comparison Table
| Software | Gradient removal | Noise reduction | Image stacking | Color correction | RAW support | Localized settings | Additional plugins |
|---|
| PixInsight | ✅ | ✅ | ✅ | ✅ | ✅ | ✅ | ❌ |
| Photoshop | ✅ | ✅ | ❌ | ✅ | ✅ | ✅ | ✅ |
| DeepSky stacker | ✅ | ❌ | ✅ | ❌ | ✅ | ❌ | ❌ |
| Affinity Photo | ✅ | ✅ | ❌ | ✅ | ✅ | ✅ | ❌ |
| StarTools | ✅ | ✅ | ❌ | ✅ | ❌ | ❌ | ❌ |
Using any of these programs depends on your needs and experience. Each brings unique capabilities to enhance your astrophotography and mitigate the effects of light pollution. Consider combining tools for the best results.
Some practical tips to mitigate light pollution in your photographs
Although tools and software help solve some of the problems caused by light pollution, sometimes it is best to start by preparing your work area well; some of the best practices that can help you are the following:
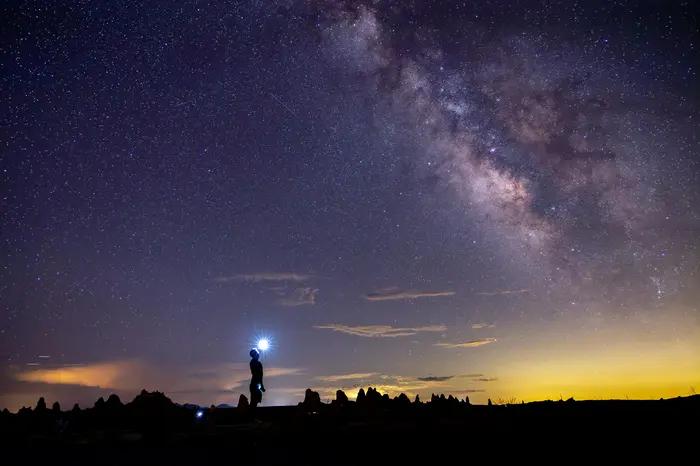
Avoid the full moon: Moonlight is one of the primary sources of natural brightness in the night sky. Its luminosity can obscure faint objects such as galaxies and nebulae during the full moon. Plan your astrophotography sessions during the new moon or in the days around it when its influence is minimal.
Turn off unnecessary lights: If you're shooting from your home or a controlled location, turn off any outdoor lights that may interfere with the capture. Place barriers, such as blackout curtains, to block nearby light sources, such as those from neighbors.
Use lenses and telescopes with anti-reflective coatings: Anti-reflective coatings on lenses and optics help reduce flare and reflections caused by nearby artificial lights, improving image quality.
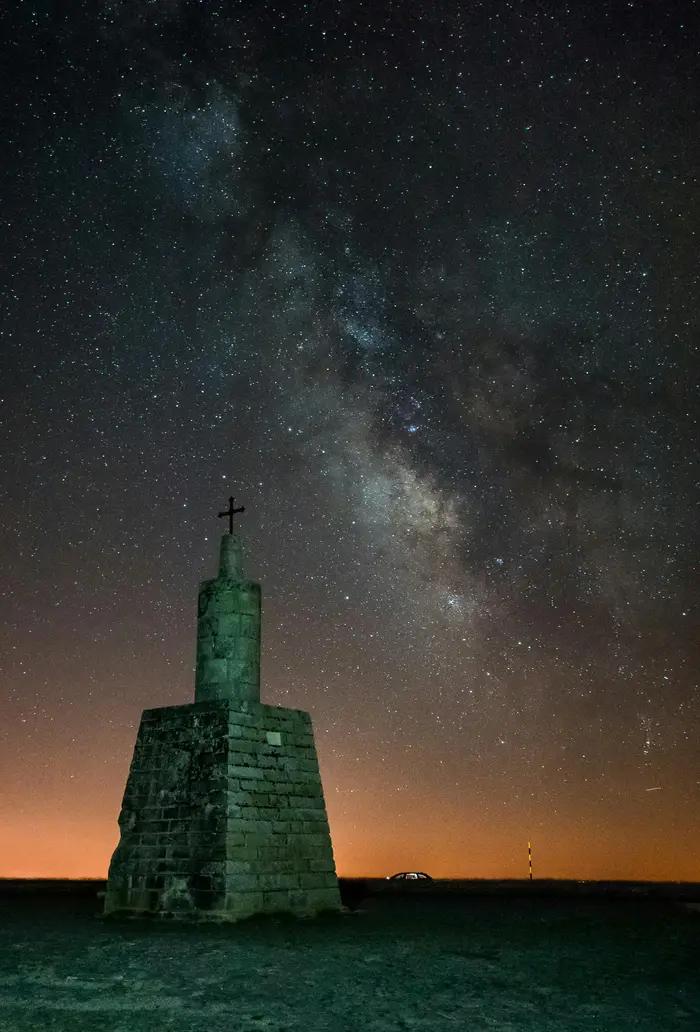
Photography towards the zenith: Pointing the camera or telescope toward the highest point in the sky minimizes the amount of light pollution that is captured since artificial light tends to concentrate near the horizon.
If all this is not enough, there is always an alternative that is usually the definitive solution.
Get as far away from civilization as possible: This is, without a doubt, the most effective method to reduce light pollution in your photos; move to high places and far from large cities. Mountains or rural areas are ideal, as the cleaner atmosphere and lower density of artificial light significantly improve observing conditions.
Applying these tips will allow you to improve the contrast and quality of your astrophotographs, maximizing the chance of capturing stunning images of the cosmos.
Consider other industry factors
Remember that moving away from the city does not always guarantee clearer skies. Some factors can make moving away from the city not guarantee a decrease in light pollution. If you do not research the place well, the result may be the opposite of what you expected.
This is because light pollution does not come only from cities. Some industrial sites also contribute significantly:
- Oil and gas refineries: Fuel production plants and refineries usually have gigantic safety lighters that give the sky an intense orange hue. This glow, caused by fuel burning, can extend up to more than 80 km around and spoil many photographs.
- Power production plants: Power plants and wind farms usually have bright LED lights to ensure safety. This brightness can sometimes be even more intense than that emitted by some cities.
- Open-pit mines: These operations use powerful searchlights and expel large amounts of smoke and dust, making these places arguably some of the worst for astronomical observation; avoid them at all costs.
If you plan to go out of town, either to the countryside, the mountains, or the beach, for better photographs, first make sure you will not be near industrial areas. Research the place beforehand and ensure that none of the industrial sites mentioned above are within at least a radius of 100 km.
And if there is, point in the opposite direction from the nearest light source.
Areas of the world with the best sky free of light pollution
Now that we know that moving away from cities and industrial areas is the best method to mitigate light pollution, we share with you some regions of the world that stand out for offering dark and clear skies, ideal for astronomical observation and astrophotography, in case you want to visit them one day.
Sierra de San Pedro Mártir, Mexico
Located in Baja California, this mountain range is home to the National Astronomical Observatory. Its distance from large cities and its altitude make it a privileged place for astrophotography.
Maunakea, Hawaii
This volcano is home to some of the most advanced telescopes in the world. Its altitude and extremely clean air offer unique conditions for celestial observation.
Roque de los Muchachos, Spain
Located on the island of La Palma in the Canary Islands, Roque de los Muchachos is known for its low light pollution and excellent air quality.
Jasper National Park, Canada
Designated as a Dark Sky Reserve by the International Dark-Sky Association (IDA), this park is ideal for capturing the Northern Lights and deep-sky objects.
Atacama Desert, Chile
Considered one of the best places on the planet for astronomy, the Atacama Desert has extremely dark skies due to its aridity, altitude, and low population density. Observatories such as ALMA and Paranal confirm the quality of this region.
Finally, remember that light pollution represents a significant, but not insurmountable, challenge for astrophotography lovers.
With the right tools, specialized software, and careful planning, capturing spectacular images of the universe is possible, even in less-than-ideal conditions.
If you can venture to places with dark skies like the ones mentioned above and get some of the tools we suggest, the experience of observing and photographing the cosmos will be even more unforgettable.